


 Optimizing Your Production with 5-Axis CNC Machining
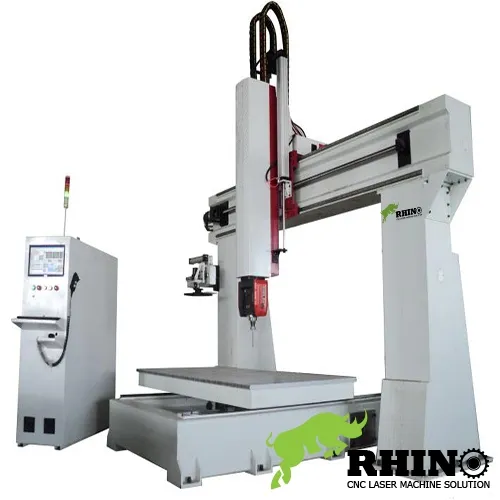
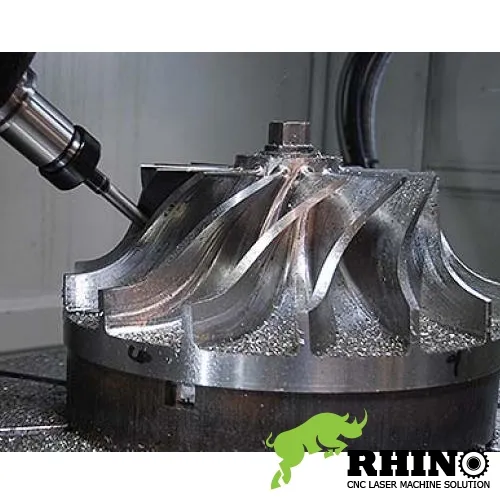 The Art of Precision: 5-Axis CNC Routers in Detail-VIDEO
The Art of Precision: 5-Axis CNC Routers in Detail
The Art of Precision: 5-Axis CNC Routers in Detail-VIDEO
The Art of Precision: 5-Axis CNC Routers in Detail
How to Intallation Mini Laser Machine-Small Laser Engraver-Small Acrylic Cutting Machine-Laser Cutter ?
When you get a new co2 laser engraver, do you know how to install it well ? In thie video we show you steps by steps how to installation mini laser machine-small laser engraver, if you have any questions also we type all steps clearly below:
There are three steps to install the laser engraving machine:
1. Placement
The laser machine should be placed in a ventilated and dry place, close to the ground wire. After debugging the machine, try not to move it again, otherwise the light path will need to be readjusted again.
2. The most important thing is to install this step
Put a copper wire with a diameter of 2MM or more into the ground (depth M or more), and connect the other end to the processing power supply.
Insert the control card into the PCI slot of the microcomputer, tighten the screws, and connect the data cable; insert the USB dongle, and install the operating software and dongle driver.
Fill the water tank with pure water, plug in the water pump and air pump, and connect the inlet and outlet pipes and air inlet pipes. After the water circulates for a few minutes, observe whether there are bubbles in the laser tube, and rotate the laser tube to squeeze out the bubbles.
Connect the laser tube water circulation tube and the cathode and anode wires, and then put in the laser tube snap ring. Connect the laser power supply and the cathode and anode of the laser tube, and plug in the data cable.
After finish installation, we need to check working well or not, below are steps how to do it :
1. Prior inspection
Check the laser head, focus lens, cooling system and exhaust system to see if they are well or not.
2. Start-up
Turn on the gas switch, turn on the cooling device, turn on the equipment, then turn on the equipment switch, laser switch, and key switch in sequence. After turning on the machine, check whether the signal light has a warning prompt. If so, troubleshoot the alarm according to the signal light indication.
3. Prepare for processing
Place the materials that need to be engraved, turn on the laser board, set the corresponding processing parameters according to the material, including laser power, laser speed, focus size and other parameters, simulate engraving on the sample, adjust the parameters according to the process requirements, and then start the proofing test.
4. Testing
Start the proofing test. During engraving, use the information displayed on the laser board to determine whether the processing time and power are reasonable. After the engraving is completed, check the finished product to see if there are any problems such as discoloration of the engraving, blackening of the material, uneven cutting seams, or incomplete cutting.
5. Process adjustment
According to the condition of the sample, the processing technology is adjusted, and then the rest is continued until the finished carving meets the process requirements.
Other requirments you need to be more careful in operation:
1. Operators must undergo training, be familiar with the structure and performance of the equipment, and have much knowledge about the operating system.
2. Wear labor protection equipment in accordance with regulations, and must wear protective glasses that comply with regulations.
3. Do not process a certain material before knowing whether it can be irradiated or heated by laser to avoid the potential danger of smoke and vapor.
4. Keep the fire extinguisher within easy reach; turn off the laser machine or shutter when not producing; do not place paper, cloth or other flammable materials near the unprotected laser beam.
5. When an abnormality is discovered during processing, the machine should be stopped immediately and the fault should be promptly eliminated or reported to the supervisor.
6. Keep the laser machine, bed and surrounding areas clean, orderly, and free of oil stains, and workpieces, materials, and waste materials should be stacked according to regulations.
7. Follow high-voltage safety regulations during maintenance. Every 40 hours of operation or maintenance every week, every 1,000 hours of operation or maintenance every six months, must be carried out in accordance with regulations and procedures.
At the end whish every person purchased a good co2 laser cutter and use it well no any problem!
Rhino mini co2 laser cutter recommended:

Detail specification of R-6040 Laser cutting engraving machine
| ▶ Model | R-6040 laser cutting and engraving machine |
| ▶ Laser type | CO2 laser tube, water-cooled |
| ▶ Laser power | 60W laser tube RECI brand |
| ▶ Working area | 600mm x400mm (width x length) |
| ▶ Engraving speed | 0-6000cm/min |
| ▶ Cutting speed | 0-5000cm/min |
| ▶ Repeating location | ≤±0.01 |
| ▶ Transmission type | Belt transmission |
| ▶ Driving system | stepper motor |
| ▶ Machine table | Conveyor table |
| ▶ Work tabke | Aluminium blade table |
| ▶ Graphic format supported | BMP, HPGL(PLT), JPEG, DXF,AI, DST |
| ▶ Software supported | CorelDraw, AutoCAD, Photoshop, Tajima |
| ▶ Control system | RDCAM software |
| ▶ Working voltage | 220V or 110V, 50Hz-60Hz |
| ▶ Optional parts: | Laser tube 80w/100w/130w/150w Working table honeycomb working table wih up and down function Red dot function |
| ▶ Warranty service: | Machine 24 month warranty for free and long life service Laser tube 12 month warranty for free |
