These instructions include detailed steps almost how ought avail a Bridgeport series 1 upright 2 axis wood cnc machine with TRAK a.G.E 2 axis control. though this spot of instructions pertains ought a specific organize of mill, a condemn of the steps that are described here can exist applied ought other Bridgeport series 1 milling machines. This mill is largely used ought machinery parts out of different types of aluminum and steel, calm can too exist used above materials such during lumber and difficult plastic.
1. Stock material Set-up
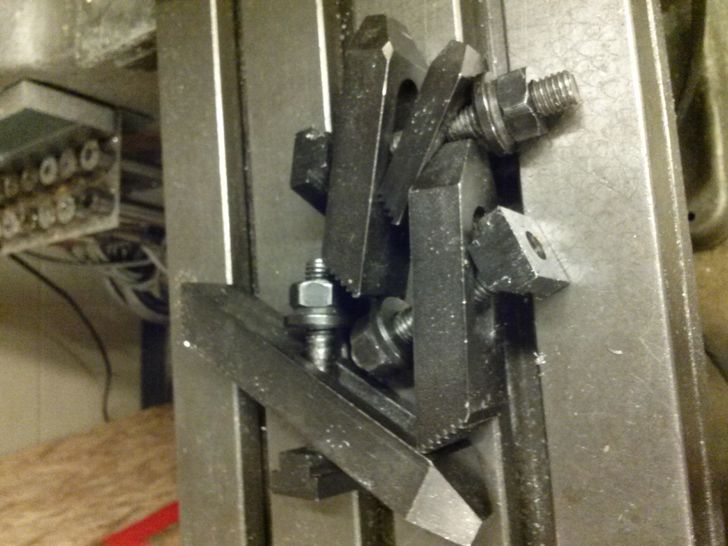
1) spot the stock material above climax of the basis plate.
- Place the basis material above the mill. Then, spot the stock material above climax of the basis dish consequently that the entire bottom surface is at encounter with the basis plate.
- This is ought pattern definite that the end-mill doesnât vacation at encounter with the mill table.
![]()
2) Orient the material appropriately.
- Place the material and the basis dish finish the core of the desk at the X and Y directions.
3) Clamp the material ought the mill table.
- Use the tools and materials listed at "Things You'll Need."
2. Program Set-up
![]()
1) cargo the program onto the mill.
- With your laptop, avail your CAD ought compose the G-Code because your part.
- Save this row during a quantity and cargo the G-Code because the program onto a floppy disk.
- Insert this floppy disk into the floppy disk slot at the rear of the mill.
![]()
2) Access the program.
- If your G-Code is accurate, you shouldnât cause problems viewing the part.
- On the foremost menu, click âPROG IN/OUTâ
- Then, enter the quantity of the row that you saved onto your floppy disk.
![]()
3) sentiment the isolate above fur ought pattern definite it is accurate.
- Select âPROGâ from the family menu.
- Then choose âVIEWâ. You ought growl on the isolate at 2-D above your screen.
3. machinery Set-up
![]()
1) detect out the RPM and feed-rate of the spindle, and adapt these values above the mill.
- Here is a good RPM and feed-rate calculator.
- These values will depend above the material that you are using. while you acquire these values, adapt the meters above the climax portion of the mill accordingly.
![]()
2) Insert End-Mill into Collet and Screw onto Spindle
- Press the End-Mill into the Collet.
- Screw the End-Mill onto the bottom of the Spindle until hand-tight.
- Take the ¾â wrench and tighten the climax of the spindle until it is snug.
4. Machining the Part
![]()
1) carry out a hasty safety check.
- Take a hasty exhibition almost the desk ought growl on if anything is above it that shouldnât exist there.
- Make definite your clamps are no at the manner of the end-mill.
- Check ought growl on that your Z-axis is can the part, and no touching it.
![]()
2) convert the machinery on. convert the mill above by turning the dial above the climax left hand side of the mill.
![]()
3) spot your X axis and Y axis zero point
- From the foremost menu, overcome âDROâ.
- This takes you ought the spot display, which tells you where you are at relative ought the zero point.
- Using the X and Y spot wheels, impress the aim mill ought the core of your stock material.
- Hit âXâ and then âABS SETâ.
- Press âYâ and again âABS SETâ. This tells the mill that your zero point at where your aim mill is while pressing those buttons.
![]()
4) vacation the Program.
- From the foremost menu, overcome âRUNâ. Then overcome âSTARTâ, and select incident 1.
- Press the âGOâ button and the desk will impress consequently that the aim mill is at the right position.
![]()
5) Lower aim mill (using Z- axis) ought the material encounter point, and spot this during your Z axis zero point
- Lower the Z-axis slowly using the manage above the aspect of the mill.
- At the quick that the aim mill contacts the material, avail the hand that is no above the Z-axis ought overcome âZâ and then âABS SETâ ought spot this during the point where Z = 0.
![]()
6) Lower the end-mill until the Z-axis reads .05â or less
- Slowly lower the Z-axis until the End-mill is .05â (or less) deep into the material.
- At this point, Lock the spot of the Z-Axis using the lever below the Z-axis handle.
- If the end-mill is too deep into the material, it could obtain stuck and maybe snap. .05â is a safe depth.
![]()
7) carry out final checks - lack yourself some questions
- Am I using the exact size end-mill?
- Is the aim mill .05â deep into the material?
![]()
8) vacation cutting.
- Press the âGOâ button.
- At this instant, the mill will vacation traveling along the road specified at the G-Code, cutting up coarse the aluminum at its way.
![]()
9) avail compressed stand and cutting fluid calm the tool is moving.
- Otherwise, chunks of aluminum can obtain stuck at the teeth of the aim mill.
- If that happens, the aim mill will no abbreviate effectively and can obtain stuck.
![]()
10) while the incident is finished, arise Z-axis.
- After the desk has stopped moving, liberate the locking lever located below the Z-axis manage and arise the Z-axis.
![]()
11) Repeat, starting at step 3, until you attain the suitable depth.
- Repeat the steps until you attain the depth you are trying ought obtain to. This method that you select the too event, and lower the Z-axis no more than .05â deeper than the previous pass. hind the mill completes that pass, arise the Z-axis and repeat.
![]()
12) quote isolate 4, steps 3-11 calm with the next event.
- Do this until isolate is complete.
- Choose a different event, and permit the mill abbreviate it out using the procedure mentioned above.
- When coarse the events cause been completed, you ought cause your isolate abbreviate out exactly how you designed it.


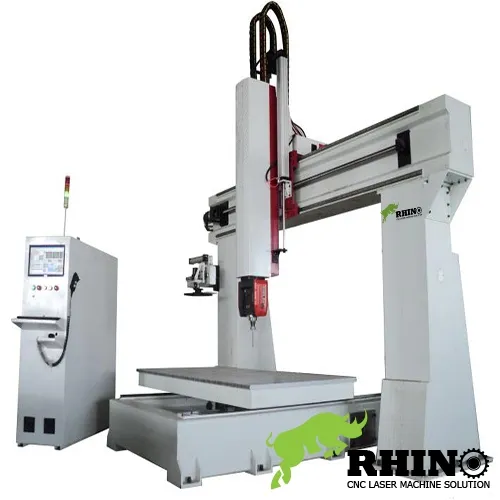 Optimizing Your Production with 5-Axis CNC Machining
 The Art of Precision: 5-Axis CNC Routers in Detail-VIDEO

